Tuesday, 29 December 2015
Hawaii holiday
I hope you have had a relaxing, refreshing Christmas break. I have been in Hawaii where my routine has consisted of walking a mile and a half to our favourite coffee place every morning, and very little else. It's been perfect and I'm feeling ready to get back to the classroom. Here's a peek at the place we were staying.
Sunday, 6 December 2015
Christmas Math freebies
Report cards and overviews are done - AT LAST!! It feels like I've been working on them for months. And maybe I have.....A new grade, a split class, and a totally new reporting system (without a number of bugs worked out) made for a lot of extra work. The good news is that I submitted them last week and they came back with NO CORRECTIONS!!!!
So on to new things, like getting ready for Christmas. I actually only have 2 days left to teach before taking off (to Hawaii) because tomorrow is a Professional Development Day. Wednesday we're going to see Mary Poppins which is being presented by the local theater group. We leave at 10:00 and get back just about in time to go home, so really I only have one teaching day left.
I usually suspend what we're working on in the classroom for the last couple of weeks before Christmas break, and we make crafts and do some lessons on Christmas around the world. I've been getting together a few math games and some pages to leave for my students to do when my awesome substitute teacher is covering for me, and the kids need something to fill in a bit of time.
I thought you might like some of them, too. Click on the images to go to them!
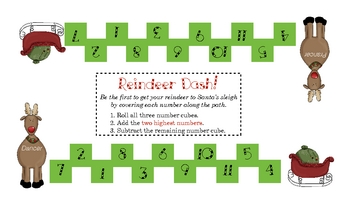
 These three are all by Teresa at Games 4 Learning. This is one of my go-to places for Math games. She has oodles of great activities, including more Christmas freebies. I'll just give you her link in her button so that you can go check the others yourself:
This one from Teach with Laughter was a big hit in my classroom last year, and an excellent opportunity to practice a valuable Math skill.
Here's a good game from Denise at Sunny Days.
This is a game from The Hands On Teacher in First that the whole class can play, or it can be used as a matching activity for one or two students.
These last ones are freebies from my store. My kids love Slide and they play it in every season. I have year round packs posted here.
I hope you enjoy the freebies and are all ready for the holiday season!
So on to new things, like getting ready for Christmas. I actually only have 2 days left to teach before taking off (to Hawaii) because tomorrow is a Professional Development Day. Wednesday we're going to see Mary Poppins which is being presented by the local theater group. We leave at 10:00 and get back just about in time to go home, so really I only have one teaching day left.
I usually suspend what we're working on in the classroom for the last couple of weeks before Christmas break, and we make crafts and do some lessons on Christmas around the world. I've been getting together a few math games and some pages to leave for my students to do when my awesome substitute teacher is covering for me, and the kids need something to fill in a bit of time.
I thought you might like some of them, too. Click on the images to go to them!
 These three are all by Teresa at Games 4 Learning. This is one of my go-to places for Math games. She has oodles of great activities, including more Christmas freebies. I'll just give you her link in her button so that you can go check the others yourself:
This one from Teach with Laughter was a big hit in my classroom last year, and an excellent opportunity to practice a valuable Math skill.
Here's a good game from Denise at Sunny Days.
This is a game from The Hands On Teacher in First that the whole class can play, or it can be used as a matching activity for one or two students.

These last ones are freebies from my store. My kids love Slide and they play it in every season. I have year round packs posted here.
I hope you enjoy the freebies and are all ready for the holiday season!
Sunday, 22 November 2015
Sunday Scoop: reading assessment and freebie
Report cards are looming. You know how that feels. Stressful. On the positive side, I've been pro-active about getting running records done over the last month so I only have 6 left to do. And 3 of those are kids who are "exceeding expectations" in our current educational jargon, so they'll be fun to listen to.
In our school district we are required to do running records for kids in second and third grades every term. Grade one's get a hiatus first term. From this particular assessment, anyway......
We use Nelson's PM Benchmarks kits. I really enjoy doing running records with the students, for a whole bunch of reasons.
1. When it's their turn, they feel very special to have me all to themselves. This still surprises me after only a thousand + times (16 years x 22 kids x 5 assessments each - I usually do at least 6/year/student now, but lots of years I had firsties). Seriously, I sometimes think I could give out prize tickets for this and they'd be thrilled!
2. I get a really good first-hand snapshot of where they're at, and what their strengths and challenges are.
3. I know you're nor supposed to jump in, but I do anyway, because it's a great opportunity for one-on-one instruction if you notice that they're encountering a difficulty. But not a minor one; those can wait until they're done reading. Usually when I do this it's to get them to try a reading strategy that they're missing. And very often it's the one I call "my magic strategy": skip over, read on, then go back and read the sentence again. Even though I teach this strategy at the beginning of the year (except in grade one where it's a bit later) many of the kids who have struggled a bit with reading are so stuck on sounding out that they've never tried this strategy until they do it during a running record session. I LOVE the way their eyes light up when they figure the word out from reading it in context. It definitely is magical FOR ME! (Even though I code it as an error: TG "skip over strat". ) The next time I listen to them they're just about sure to use it with a look of triumph. 

I made reading strategy bookmarks that they glue onto construction paper and I laminate. They keep them in their Home Reading bags to remind them of some options if they're struggling with an unfamiliar word. I also keep one out on my table during my running record sessions. If you'd like a FREE set click HERE.
4. I get to make an immediate positive comment or two about their reading.
5. I get to listen to them retell which not only gives me excellent insight into their comprehension, but provides information for the 'Listening and Speaking' reporting section.
6. I find out things beyond what level they're reading fluently at. For example, it sometimes is surprising when a child struggles through a book, sounding out lots of words, and then demonstrates excellent comprehension of the text. Or the opposite: they read fluently and expressively, but hardly recall anything (which is often not that they CAN'T comprehend it, but that they're so focused on doing an impressive job of reading that they're not listening to what they're reading). In this case I usually tell them that I'd like them to read a different passage silently, paying attention to what they're reading, and then I have them retell it when they're done. Usually they do a great job the second time when the pressure of performing isn't part of the equation.
7. I get a very good idea if it's time to do a mini lesson on a particular aspect of reading with the whole class or a small group.
I hope you're having a wonderful weekend. Tomorrow I'm going to the Barra MacNeils' Christmas concert with my family. (It's a birthday present!) They come around this way every couple of years and it's always a treat to hear them perform. The highlight is always when Lucy sings O Holy Night.
I was also lucky enough to attend the Lunenberg Folk Festival in Nova Scotia a couple of years ago and they were there all week. It was fabulous!
I'm linking up with Teaching Trio this week for The Sunday Scoop. HOpe you've had a great weekend!
Saturday, 21 November 2015
Adding 2 digit numbers on an open number line
I've been busy writing reports cards, and have gotten way behind on blogging.
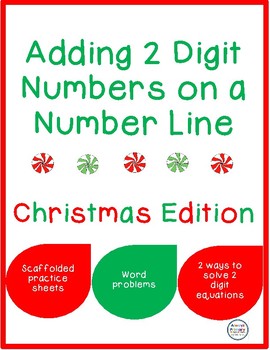
I'm almost done and made this set of pages for my students to practice adding 2 digit numbers on an open number line. Grab it here if you can use it.
I'm going to link it up to Fern Smith's Freebie Friday over at Teaching Blog Addict - day late.
I'm almost done and made this set of pages for my students to practice adding 2 digit numbers on an open number line. Grab it here if you can use it.
I'm going to link it up to Fern Smith's Freebie Friday over at Teaching Blog Addict - day late.
Wednesday, 4 November 2015
QR codes and Quick Math review cards
I am joining up with Teaching Trio's Favorite Things again this month.
Here are my November faves:
#1 - I've been using QR codes on lots of things I've been making for my class lately. The kids love using them. I've put them on Math and Language Arts task cards and most recently on Scan to Win tickets that they can buy for 5 classroom dollars. I got the idea from Joanne at Head Over Heels for Teaching HERE. I personalized the set of 25 different tickets for my younger class. You can get hers at TpT HERE.
QR codes are super easy to add and to use. I get them from QR Stuff. Here's what the page looks like:
Just select "Plain text", fill in what you want the text to read, and click on DOWNLOAD. Don't bother with the 4th step. After the code is downloaded just right click on it, select COPY, then paste it into your document. To read it you need to download a QR scanner. There are plenty to choose from. I use Quafter.
#2 - I made this Home Time Clean Up chart last week and has it ever made a difference in the classroom. Everyone is focused on their job, and things are done quickly and efficiently. I've done this before and I'm not sure why it took me so long to get it established this year.
My class sits at 4 hexagonal tables - 6 kids at each table. I put numbers stickers under the lips of the tables, so that each student has a number from 1 to 6. When a student is away one of the "floaters" from tables 3 or 4 fill in for them. The supervisor checks that the jobs are done and everyone has stacked their chair before they leave. They also help everyone out.
Every other week I get them to rotate one place to the right so they have a different job. About every 6 weeks I change the seating plan completely.
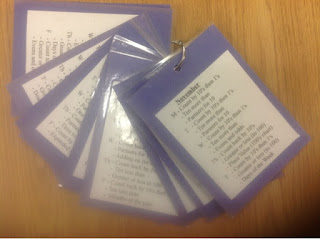
#3 - Every day when my class meets together to start our Math block I do a quick spiral review of 3 concepts. They aren't necessarily something that we are going to be working on that day. I used to do this fairly randomly, but then I decided to get more organized to make sure we covered everything they should know and needed to be using, both in school and out of it. So I went through our B.C. Math curriculum to see what they are expected to be learning over the course of the year, prioritized them, and put them in order.
I made a set of cards (grade 2) for these. There is a concept to review for each day of the week and there are cards for each month of the year. I cut them into individual months, mounted them on construction paper, laminated them, and put them onto a ring that I hang on my Math wall for easy access.
They only take a couple of minutes to do each day but this year I have third graders and I can see the difference they made, especially with concepts that you cover and then move on from.
Things like time, for example. When time is on my daily card I pull out my big Judy clock and set it to whatever increment of time I want to cover. Then I turn it around and show the class. Last year I had first and second grade, so I'd show an hour or half hour time on the clock and have the one's call out the time. The grade two's would rate their answer with a thumbs up or thumbs down, then I'd change the clock to an increment of 5 minutes for the two's to answer. In a minute there's time to do about 3 or 4 of these for each grade. If you don't have a combined class you could do double that many!
I have been amazed this year by what a great handle the kids who were in my class last year have on this concept, while the others have forgotten what they learned because it was taught in a short period of time and not reinforced over the year. I didn't actually do a time unit like I usually do with my class last year. I just threw a time worksheet in every now and then for them to work on, and included time activities in my Math drawers (centers) three or four times during the year.
Other concepts included in the grade 2 set are counting on and back, skip counting, partners for 10, 10 more/less, count by 10's then count on by 1's, months of the year, ......There are 3 for each day of the week.
If you'd like a set for free click HERE. I could make them fancier and cuter, but WHY? They WORK!
PS: If you teach grade 1-I used these same cards for my firsties, since I had the combined class last year, so this year they're all feeling confident with the grade 2 concepts.
Friday, 30 October 2015
Mini I Have, Who Has Freebie Friday
It's time for FREEBIE FRIDAY with Fern Smith of Teaching Blog Addict again. Click on her button at the bottom to head over there to see this week's goodies.
Last summer I made 3 new sets of mini I Have, Who Has games to play with my small groups. I bundled them up with the 3 sets I already had on TpT. They are for reviewing the diphthongs"aw", "ew", "ow", "oi/oy", "oo" (soft), and "oo" (hard).
I put one set on TpT for free so you can try it out and see how it works for you. To read the post and get the freebie click HERE.
Saturday, 24 October 2015
Owl craftivity
I've noticed that my kiddos love doing craft and colouring projects. And I love combining craft projects with a writing or math activity. Yay for craftivities! They make me happy because there's some academic content and the kids are excited to be cutting, gluing, colouring, etc.
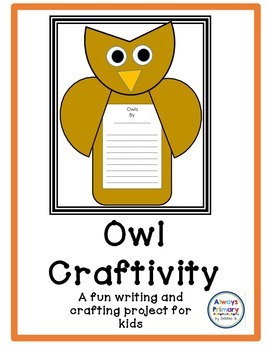
I've used various projects that I found on TpT or Pinterest, but I recently thought, "AHA! I could make these up myself." So I tried it. And it worked. Being no artist (if you don't believe me see the testimonial by clicking on the "About Me" tab at the top of the post....) I used shapes from Word and they worked just fine!
We worked on making this AMAZING (to me, anyway!!) owl project yesterday morning and afternoon (not all morning and afternoon!......they took about an hour for my 2's and 3's to get them all done).

We did the clues during Math and the owls after lunch when the kids are feeling kind of stir crazy. I showed the class how the final project will look during our morning lesson and get them to do the written part of their project before noon when they're more focused. They could talk quietly while they cut and glue. (I put some quiet music on while they were working which kept the voice levels lower).
I was going to get them to make up an owl poem to glue on the owls, but decided to go with a mystery number under a flap instead.
They had to make up 5 clues. We've been working on numeracy so they had to choose a 2 digit mystery number for under their flap. The clues had to be:
1. I have a ___ in my 10's place.
2. I am > ____ (the number 3 before).
3. I am < ____ (the number 3 after).
4. I am odd/even.
5. I am ____ + 10
(One sharp fellow came to me to protest that everyone would know the mystery number when they read the last clue!)
The kids were pumped about them and I think they turned out great. I gave them the choice of cutting and gluing the eyes and beaks that I made in the kit, or drawing their own. I like the way they added their own artistic touches to personalize their owls.
I originally thought I would photocopy all the owls on brown construction paper. But I decided it would be fun to let the kids choose, so I put out a sign up list and they selected their own colours.
 If you'd like to try out this fun activity in your room CLICK HERE to see it at TpT.
We looked at this book before we started our work and the kids noticed the ear tufts and big eyes and banded feathers.
We also started to read one of my favourite all-time novels, Owls in the Family, by Canadian author Farley Mowat. Although this book is an oldie (written in 1962) it is timeless, and the kids are fascinated by the story. There are so many hilarious parts (like where his friend puts eggs from a crow's nest in his mouth while he climbs down the tree, but then when he's just about at the bottom the branch he steps on breaks and he falls to the ground. The kids were quick to predict what happened to the eggs! There were lots of groans and exclamations of "GROSS!" "YUCK!!").
Next week we're going to make a ghost for Halloween. We'll do the poem then.
It's been a hot item on TpT the last 2 weeks. See it HERE.
I'm joining Joanne at Head Over Heels for Teaching for Spark Student Motivation Saturdays. Click HERE to see more ideas to keep your students focused and loving school.
I've used various projects that I found on TpT or Pinterest, but I recently thought, "AHA! I could make these up myself." So I tried it. And it worked. Being no artist (if you don't believe me see the testimonial by clicking on the "About Me" tab at the top of the post....) I used shapes from Word and they worked just fine!
We worked on making this AMAZING (to me, anyway!!) owl project yesterday morning and afternoon (not all morning and afternoon!......they took about an hour for my 2's and 3's to get them all done).

We did the clues during Math and the owls after lunch when the kids are feeling kind of stir crazy. I showed the class how the final project will look during our morning lesson and get them to do the written part of their project before noon when they're more focused. They could talk quietly while they cut and glue. (I put some quiet music on while they were working which kept the voice levels lower).
I was going to get them to make up an owl poem to glue on the owls, but decided to go with a mystery number under a flap instead.
They had to make up 5 clues. We've been working on numeracy so they had to choose a 2 digit mystery number for under their flap. The clues had to be:
1. I have a ___ in my 10's place.
2. I am > ____ (the number 3 before).
3. I am < ____ (the number 3 after).
4. I am odd/even.
5. I am ____ + 10
(One sharp fellow came to me to protest that everyone would know the mystery number when they read the last clue!)
The kids were pumped about them and I think they turned out great. I gave them the choice of cutting and gluing the eyes and beaks that I made in the kit, or drawing their own. I like the way they added their own artistic touches to personalize their owls.
I originally thought I would photocopy all the owls on brown construction paper. But I decided it would be fun to let the kids choose, so I put out a sign up list and they selected their own colours.
 If you'd like to try out this fun activity in your room CLICK HERE to see it at TpT.
We looked at this book before we started our work and the kids noticed the ear tufts and big eyes and banded feathers.
We also started to read one of my favourite all-time novels, Owls in the Family, by Canadian author Farley Mowat. Although this book is an oldie (written in 1962) it is timeless, and the kids are fascinated by the story. There are so many hilarious parts (like where his friend puts eggs from a crow's nest in his mouth while he climbs down the tree, but then when he's just about at the bottom the branch he steps on breaks and he falls to the ground. The kids were quick to predict what happened to the eggs! There were lots of groans and exclamations of "GROSS!" "YUCK!!").
It's been a hot item on TpT the last 2 weeks. See it HERE.
I'm joining Joanne at Head Over Heels for Teaching for Spark Student Motivation Saturdays. Click HERE to see more ideas to keep your students focused and loving school.
Friday, 23 October 2015
Skip Counting
I found
some strip puzzles that were a freebie last spring (can't remember
where, or I'd give you the link) and my class really enjoyed doing
them. I printed them in black and white and let the kids glue them
onto a blank page and colour them. They were a pretty rowdy class, but
they were happy to work on these for as long as I'd let them. There
were only 2 in the freebie and they kept asking if I would get more. Which made me think about making some.
I have been busy setting up my Math centers so that we can get to working in small groups. When I was looking through my files for activities to put into the Math drawers I found a set of puzzles on my computer that I must've started to make in the summer and them completely forgot about.
I remember that I made them so my class could practice counting by 1's, 2's, 3's, 4's, and 5's. There are always some kids that have difficulty with skip counting and can use a fun review. For those who need more of a challenge I started some of the puzzles at different numbers. You can see below how the count-by-1's puzzle starts at 63. My grade 2's have just started working on counting by 3's and 4's, and the grade 3's need to get these down pat because we'll soon be working on multiplication.
I put the finishing touches on them this morning and printed up the coloured versions. They're going to the laminator so we can start using them tomorrow. There are also black and white versions of each of the 7 puzzles so that I can photocopy them for ordering and colouring for an alternative or for early finishers.
There is a freebie puzzle in the preview file.
I'm joining up today with Fern at Teaching Blog Addict for Freebie Friday. Head over there to get more great freebies.
Saturday, 17 October 2015
Leaf Art: final products! Finally
We finished up our leaf art project on Wednesday, but I forgot to take pictures. They turned out looking super (much better "live" than in my photos). I'm glad now that we took the time to paint a background.
Before we glued the leaves onto the background we talked about how leaves don't fall off of trees in a neat, symmetrical arrangement with their stems all pointing the same way. I was pleased to see that the kids thought about this when they were placing their leaves. I noticed that there were several that had overlapping leaves and one or two that even glued a leaf a bit off the background!
Friday, 9 October 2015
Five for Friday: animals, art, and Thanksgiving
It's been a while since I joined up with Doodlebugs' Five for Friday.
By the time it gets to Friday I have a hard time thinking of ONE thing, never mind five! But it was a really busy week in my classroom and I have a bunch of things to share. Teaching 3 days a week makes it so crazy trying to fit in everything you plan to do. Especially when there's a fire drill and an assembly!
Earth Rangers came to our school this week. They are a conservation group that goes to schools to educate kids on protecting animals and habitats. This is the second time that they've visited our school and it's always tremendously popular because they bring live animals to show the kids. This year they had a tortoise, a martin, a barn owl, and a hawk. The birds flew across the gym just over the students' heads. Pretty exciting!
This picture is from last year - I forgot to take any pictures this year!
I started a fall art project on leaves on Monday. I got the idea from That Artist Woman. If I was smart I would've just made the leaves and mounted them on a black background like she did. But No, I had to add a painted background, forgetting that it would mean 3 painting sessions - the leaves take 2 because they're done on paper prepped with Gesso and tissue paper. We did NOT have time to do 3 painting sessions in 3 days, so the leaves remain unpainted, but the background is ready to go (my last group was just painting their background when the fire bell rang........). We'll finish them next week. I think they're going to look great. Here's Gail's sample and a link to her blog with the directions.

Not being particularly artistic (Ha! Understatement!) I didn't have any Gesso on hand, or admittedly, even know what it was. Internet to the rescue! I found a recipe and made my own using 1 part water, 1 part plaster of paris, 1 part white glue (Elmer's), and 2 parts white acrylic paint (although there was none in the school, so I used liquid tempera and it seemed to work fine....). It only took a few minutes to mix up and it did the job of making a nice textured paper for the leaves. I used one cup of the first 3 things and 2 cups of paint. It made enough for everyone's project plus about 1 liter left over. Should be good for another project. If I remember what it is. And if it keeps. We'll see. If you make it be sure to stir in the Plaster of Paris and mix it up well before adding the glue and paint. Otherwise it's hard to get the lumps out. Can you infer why I'm telling you this? The directions said to do this, but I dumped everything in at once (duh!).......I'm thinking that watered down glue might have worked about as well as the Gesso. I'm even thinking maybe it would've been just about as good to skip the texture step and just trace and paint the leaves.
Here's how they turned out.
Speaking of leaves.......the kids were burying each other on the playground yesterday. This is my sweet granddaughter. I'm thinking there's probably an art project .........
I started a fall art project on leaves on Monday. I got the idea from That Artist Woman. If I was smart I would've just made the leaves and mounted them on a black background like she did. But No, I had to add a painted background, forgetting that it would mean 3 painting sessions - the leaves take 2 because they're done on paper prepped with Gesso and tissue paper. We did NOT have time to do 3 painting sessions in 3 days, so the leaves remain unpainted, but the background is ready to go (my last group was just painting their background when the fire bell rang........). We'll finish them next week. I think they're going to look great. Here's Gail's sample and a link to her blog with the directions.

Not being particularly artistic (Ha! Understatement!) I didn't have any Gesso on hand, or admittedly, even know what it was. Internet to the rescue! I found a recipe and made my own using 1 part water, 1 part plaster of paris, 1 part white glue (Elmer's), and 2 parts white acrylic paint (although there was none in the school, so I used liquid tempera and it seemed to work fine....). It only took a few minutes to mix up and it did the job of making a nice textured paper for the leaves. I used one cup of the first 3 things and 2 cups of paint. It made enough for everyone's project plus about 1 liter left over. Should be good for another project. If I remember what it is. And if it keeps. We'll see. If you make it be sure to stir in the Plaster of Paris and mix it up well before adding the glue and paint. Otherwise it's hard to get the lumps out. Can you infer why I'm telling you this? The directions said to do this, but I dumped everything in at once (duh!).......I'm thinking that watered down glue might have worked about as well as the Gesso. I'm even thinking maybe it would've been just about as good to skip the texture step and just trace and paint the leaves.
Here's how they turned out.
Speaking of leaves.......the kids were burying each other on the playground yesterday. This is my sweet granddaughter. I'm thinking there's probably an art project .........
I always like to have an extra activity for the kids to do while I'm working with small groups on our main art project of the week. So while we were working on our leaf painting the others were making these.
We made these thankfulness pumpkins that I saw on Pinterest. The orange strips have sentences that they printed on: I am thankful for _______________ . They turned out really cute and the kids were thrilled to have a decoration to take home for the holiday.
I have my turkey thawing in the fridge and am making preparations for our family Thanksgiving dinner here on Sunday afternoon. I like to do the dinner a day early so that on Monday we can relax, eat leftovers and play games. And be rested up to go back to work Tuesday!
Subscribe to:
Comments (Atom)


